Adobe Captivate 2 is indeed a good tool for making software simulation, but by default it does not generate the output as FLV. I will tell you here that how you can convert your project into an FLV.
It requires Macromedia Flash to be installed on the same machine where Adobe Captivate 2 is installed.
It also requires Macromedia Flash 8 Video Encoder (or any other software which can convert AVI into FLV)
1. Create your project in Adobe Captivate 2 (Note - Create your project only as demonstration, do not include any interactivity in it)
2. Save the project.
3. Open Macromedia Flash and create a new file with the same dimensions as in your Adobe Captivate Project.
4. select File -> Import -> Import to Stage, browse and select the CP file.
5. In the options for importing DO NOT import the playback controls and DO NOT select 'slides as movieClips'
6. Export from Flash as an AVI (File -> Export -> Export Movie)
7. Now from Macromedia Flash 8 Video Encoder or any other AVI to FLV converter, you can easily convery it into an FLV.
Note that if you wish to use this FLV in any other Adobe Captivate 2 project, then you should select 'Sorenson Spark' video codec for best results.
Making Customized information for your Adobe Captivate 2 project
Monday, January 15, 2007 12 comments
If the project information button on the playbar always irritated you? Did you want to show your customized project information on click of the information (i) button on the playbar of your Adobe Captivate 2 project?
If yes, then I am going to tell you how you can customize the project information shown on click of the 'i' button on the playback control, you may show your company's logo there too :)
Note that the following tutorial requires Flash 8 and knowledge and expertise in working on Macromedia Flash 8.
We will achieve this by modifying the _skin file.
First open the 'default' skin file in Flash, it is named 'cpPlaybar.fla'. It is kept at the location 'C:\Program Files\Adobe\Adobe Captivate 2\Templates\PlaybackFLA' folder. Note that if you have installed Adobe Captivate at some other location, then locate this file by following the folder structure mentioned above.
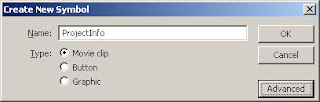
Now create a new symbol (movieClip) [Press Ctrl + F8], give it name 'projectInfo'
After this design the information as you want to appear in your project, may be something like the following:

Drag and drop this movieClip onto the main timeline in a new layer. Give it the instance name 'projectInfo_mc'. Write a ClipEvent Load function for this as follows:
onClipEvent (load) {
this._visible = false;
}
Also write
on (release){
this._visible = false;
}
[Note you can choose to put a button inside this movieClip also, which will hide this movieClip]
Now from the library open the symbol named 'pbcBtnInfo'. In the timeline you will see three layers. Open the actions on the actions layer in the actions panel. You will find the onClick action event code here. Copy and paste the following code there (remove the original code):
var btnTipsId = 9;
function onClicked(){
var myInfoMC = _parent._parent.projectInfo_mc;
myInfoMC._visible = true;
var stageHeight = Stage.height;
var stageWidth = Stage.width;
myInfoMC._x = (stageWidth - myInfoMC._width)/2;
myInfoMC._y = (stageHeight - myInfoMC._height)/2;
//_parent.onPBCBtnClick("info");
}
Save this FLA with a new name (say, cpPlaybay_new)
Now open the publish settings and in the 'Formats' tab change the path of the .swf to only the [name].swf, so that it is published at the same location. Publish the SWF. Keep the rest of publish settings as it is.
Now copy the published SWF file to the following location:
C:\Program Files\Adobe\Adobe Captivate 2\Gallery\PlaybackControls\SwfBars
Finally, inside Captivate open the skin editor (Project -> Skin...)
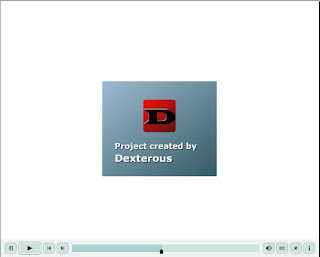
From the 'playbar' drop down combo box, select the SWF which you created. Thats it, you are done, now publish the project from Adobe Captivate. Following image shows how it will look on click of the information button:
Important : Few of the new transitions available in Flash 8, Filters, and/or new text rendering options may not be supported here. If you face issues, make your playbar as Flash player 7 SWF by changing the publish settings. If you face any issues implementing the above please leave a comment.
If yes, then I am going to tell you how you can customize the project information shown on click of the 'i' button on the playback control, you may show your company's logo there too :)
Note that the following tutorial requires Flash 8 and knowledge and expertise in working on Macromedia Flash 8.
We will achieve this by modifying the _skin file.
First open the 'default' skin file in Flash, it is named 'cpPlaybar.fla'. It is kept at the location 'C:\Program Files\Adobe\Adobe Captivate 2\Templates\PlaybackFLA' folder. Note that if you have installed Adobe Captivate at some other location, then locate this file by following the folder structure mentioned above.
Now create a new symbol (movieClip) [Press Ctrl + F8], give it name 'projectInfo'

After this design the information as you want to appear in your project, may be something like the following:

Drag and drop this movieClip onto the main timeline in a new layer. Give it the instance name 'projectInfo_mc'. Write a ClipEvent Load function for this as follows:
onClipEvent (load) {
this._visible = false;
}
Also write
on (release){
this._visible = false;
}
[Note you can choose to put a button inside this movieClip also, which will hide this movieClip]
Now from the library open the symbol named 'pbcBtnInfo'. In the timeline you will see three layers. Open the actions on the actions layer in the actions panel. You will find the onClick action event code here. Copy and paste the following code there (remove the original code):
var btnTipsId = 9;
function onClicked(){
var myInfoMC = _parent._parent.projectInfo_mc;
myInfoMC._visible = true;
var stageHeight = Stage.height;
var stageWidth = Stage.width;
myInfoMC._x = (stageWidth - myInfoMC._width)/2;
myInfoMC._y = (stageHeight - myInfoMC._height)/2;
//_parent.onPBCBtnClick("info");
}
Save this FLA with a new name (say, cpPlaybay_new)
Now open the publish settings and in the 'Formats' tab change the path of the .swf to only the [name].swf, so that it is published at the same location. Publish the SWF. Keep the rest of publish settings as it is.
Now copy the published SWF file to the following location:
C:\Program Files\Adobe\Adobe Captivate 2\Gallery\PlaybackControls\SwfBars
Finally, inside Captivate open the skin editor (Project -> Skin...)
From the 'playbar' drop down combo box, select the SWF which you created. Thats it, you are done, now publish the project from Adobe Captivate. Following image shows how it will look on click of the information button:

Important : Few of the new transitions available in Flash 8, Filters, and/or new text rendering options may not be supported here. If you face issues, make your playbar as Flash player 7 SWF by changing the publish settings. If you face any issues implementing the above please leave a comment.
Creating Accessible content with Adobe Captivate 2
Sunday, January 14, 2007 0 comments
Though creating accessible content was possible in Macromedia Captivate also, with the release of Adobe Captivate 2, it has just got better.
In a nutshell, The guidelines of Accessibility (as also in the section 508) state that the content created must be accessible for everyone, even if they are physically challenged (say visibly challenged for instance)
While creating accessible content, the author must put Text equivalents for every visible content, text equvalent for each audio used in the project, make all the text used in the project accessible so that it can be read by the screen reader software like JAWS or Window-eyes and keyboard equivalent for each button used.
Though the rest of things are responsibilty of the content author, Adobe Captivate 2 takes care of making the text accessible to the screen readers. Following is the list of things that Adobe Captivate 2 makes accessible :
1. Project Name and Description (Derived from Project Properties)
2. Slide Accessibility text (Derived from Slide Properties)
3. All the buttons' text labels
4. Labels of the playBack controller
5. Text and button labels of every question slide
6. Text and button lables of the 'Result Slide'
7. Password protection (if any Adobe Captivate SWF file is password protected, the prompt for a password is read by screen readers)
8. Slide Labels (Derived from the Slide Properties)
To enable the accessibility for your project Open the Project Preferences (Project -> Preferences), switch to the preferences tab and check the checkbox titled '508 compliance' (Note that by default this is checked, if you wish that your content should not be accesible, then uncheck this box, However, it is not recommended)
In addition to the above, Adobe Captivate 2 Also enables the content authors to add Closed Captions to audio used in the project. The end-user can read the closed captions by clicking on the 'CC' button on the playBack controller.
Adobe Captivate 2 also makes it very simple to add the closed captions to audio used. A content author can either add the closed caption to a particular audio by using the audio tab in the slide properties OR he/she can also use the Advanced audio dialog to edit the closed captions for every audio used in the project.
The content authors can edit the look and feel of how the closed captions appear when the end-user clicks on the CC button. If you wish to edit the look and feel of the closed captions for your project, do the following:
Open the skin editor (Project -> Skin...) and click on the 'settings' button below the closed captioning checkbox. You can edit various settings such as number of displayed lines of text, foregroung.background colors, etc.
Note that this option of CC button on the playback controller is available only with the new Adobe Captivate 2 style playback controllers, with the old-style BMP playback controllers it is not available.
Using old-style playback controls in Adobe Captivate 2
Sunday, January 7, 2007 0 comments
Though in the latest release, Adobe Captivate 2, you can customize the playback controls, you may be wondering that whatever happened to the old-style playback controls (which were available in Captivate 1.01).
So, those are still there in Adobe Captivate 2 also (really!)
To use old (Captivate 1 style) playback controls, do the following:
1. Open the Skin Editor (Project -> Skin...)
2. From the 'Skin' Drop down combo box, select 'BMP Playbars'.
3. Now from the 'playbar' drop down combo box you can select any of the playback controls which were there in Captivate 1.01
Subscribe to:
Posts (Atom)